 Dimension Add Arc ( Drawing Editor )
Tool summary :
Also see :
- Dimensions (topic)
- Edit Arc Dimension (edit window for arc dimensions)
- Arc dimension (topic)
- Unshorten (before Dimension Add Arc )
- Layer Panel (drawing layer the dimension will be added to)
- Add Dimension (another way to Dimension Add Arc )
- The parts of a dimension (terms used to describe dimensions)
page 1 | contents | objects > arc dims > | objects -- arc dims | xxx add
 Setup ( Dimension Settings ) :
- Dimension terminals (arrows or slashes)
- Show "on radius" dimension (checked or not checked)
- Show angle dimension for arc dimensions (as degrees or as radians, etc)
- Material point dimension holdback distance
page 1 | contents | objects > arc dims > | objects -- arc dims | xxx add | top
 Defaults for auto detailing :
- The " Dimension pen color " for the legs and lines of automatically detailed and user-added dimensions is set in Drawing Presentation . To change this on individual drawings, reset the " Pen color " on the edit window.
page 1 | contents | objects > arc dims > | objects -- arc dims | xxx add | top
 Basing arc dimensions off of a circular object :
Preselection of a construction circle or circle or arc or arc dimension or circular member line is required. Do not preselect elliptical circles or elliptical constructions circles. Dimension Add Arc can only base arc dimensions off of circular objects. If you do not have an appropriate preselection -- for example, if you have selected more than one object or a non-circular object -- Dimension Add Arc instead adds an arc dimension based only on the located points as described in the next section . The following instructions assume that you are using a 3-button mouse and that User and Site Options > Modeling > " Confirm adding of dimensions " is off (not checked).
Before using this tool:
Recommended: Unshorten if you are in a shortened drawing such as a member detail.
Optional: On the Layer Panel, select the layer that you want to add the dimension to.

|
1 . In Select Items mode, left-click ( Select ) the circular object (an arc in this example) that you want the " on radius " dimension to be based on. |

|
2 . Invoke Dimension Add Arc . |
|
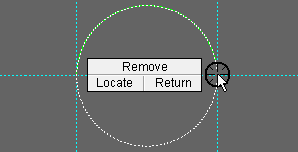
3 . Dimension Add Arc draws a temporary construction circle. Left-click ( Locate ) points where you want the feet of the dimensions. These points should be on the selected object, but don't have to be. |
|
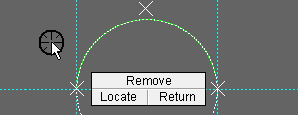
4 . An X marks each point you located in the previous step. Right-click ( Return ) when you are done locating points. |
|
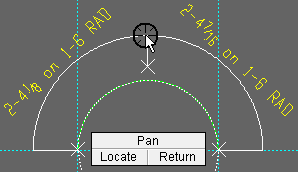
5 . Dimension Add Arc draws arc dimensions to each of the points you located. Optionally reposition the dimension line, then left-click ( Locate ) to continue. Do not right-click ( Return ), or the arc dimensions will go away and you'll have to start all over. |
|
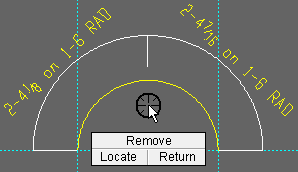
6 . The temporary construction circle disappears, and the chain of arc dimensions is now added. You can add additional chains of arc dimensions, or right-click ( Return ) if you are done. See note 4 . |
Note 1: See the introduction for more on preselecting an object. A circular member line can only be selected on an erection view. Circular members shown on member details are polygons and cannot be based off of to add arc dimensions.
Note 2: To invoke Dimension Add Arc , you can choose Objects > Arc Dimensions > Add , or use a keyboard shortcut (if one has been set up), or click the icon pictured above (if it has been placed on your tool bar).
Note 3: Middle-click ( Remove ) in steps 3 or 4 undoes the placement of the last-located point.
Note 4: If you do not right-click ( Return ) in step 6, any additional chains of arc dimensions you add must be added by locating points .
Tip: Arc dimensions added using this procedure can be quickly removed (one chain at a time, in reverse-order of their addition) by using Undo .
page 1 | contents | objects > arc dims > | objects -- arc dims | xxx add | top
 Adding an arc dimension by locating 3 points in circular alignment :
A minimum of three points -- located counterclockwise -- are required to define an arc. The third point is not a dimensioning point, but is used by Dimension Add Arc to calculate the radius and center of the arc dimension. After the third point is located, you can add additional dimensions to the dimension chain as described in the next section . The following instructions assume that you are using a 3-button mouse and that User and Site Options > Drawings > " Confirm adding of dimensions " is off (not checked).
Before using this tool:

|
1 . Invoke Dimension Add Arc . |

|
2 . Left-click ( Locate ) a first point. Dimension Add Arc marks the point with an X and will dimension to this point in step 6. |
|
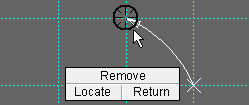
3 . An arrow draws as you move the point location target. Left-click ( Locate ) a second point that is counterclockwise to the first point. The program marks the point with an X. |
|
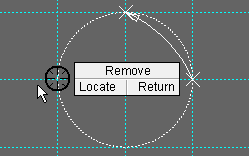
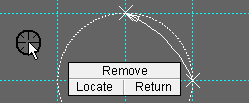
4 . Dimension Add Arc draws a temporary construction circle that includes the two located points. Left-click ( Locate ) a third point that is counterclockwise to the second point. This point will not be dimensioned to, but is used to calculate the " on radius " dimension. |
|
5 . Right-click ( Return ) to signal you are done (or see the next section if you want to add addition arc dimensions to the chain). |
|
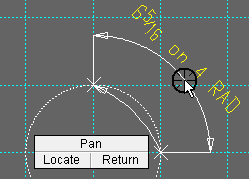
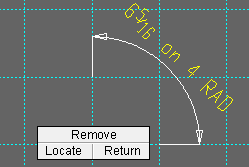
6 . Dimension Add Arc draws an arc dimension to the first two points you located. Optionally reposition the dimension line, then left-click ( Locate ) to continue. Do not right-click ( Return ), or the arc dimension will go away. |
|
7 . The temporary construction circle disappears, and the arc dimension is now added. You can add additional chains of arc dimensions, or right-click ( Return ) if you are done. |
Note 1: To invoke Dimension Add Arc , you can choose Objects > Arc Dimensions > Add , or use a keyboard shortcut (if one has been set up), or click the icon pictured above (if it has been placed on your tool bar).
Note 2: The counterclockwise curved pointer that appears when you locate the second point (step 3) indicates the start point and the direction that the dimensions will progress. It goes away when the operation ends.
Note 3: Middle-click ( Remove ) in steps 3 or 4 undoes the placement of the last-located point. Removing the second located point makes the directional pointer disappear.
Note 4: The construction circle that appears in step 3 may adjust in size when the third point is located. Once the third point is located, the temporary construction circle remains the same size. An X does not mark the third point since it is not dimensioned to.
Tip: Arc dimensions added using this procedure can be quickly removed (one chain at a time, in reverse-order of their addition) by using Undo .
page 1 | contents | objects > arc dims > | objects -- arc dims | xxx add | top
 Adding a chain of arc dimensions by locating points :
This is the same procedure as adding an arc dimension by locating points , except that instead of right-click ( Return ) after locating the third point (the non-dimensioning point used to calculate the " on radius " dimension), you left-click ( Locate ) one or more other points to add other dimensions to the chain. The points you locate to place additional dimensions do not necessarily have to be on the temporary construction circle. The following instructions assume that you are using a 3-button mouse and that User and Site Options > Drawings > " Confirm adding of dimensions " is off (not checked).
| Steps 1, 2, 3, 4 . Exactly follow the instructions for adding an arc dimension by locating points (three points) in a counterclockwise rotation. | |
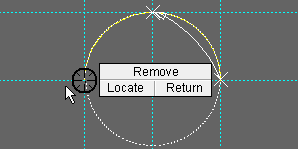
|
5 . The temporary construction circle includes the three located points. Left-click ( Locate ) to add additional points. Dimension Add Arc will dimension to these points in step 7. |
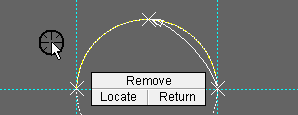
|
6 . Dimension Add Arc marks each point you located in step 5 with an X. Right-click ( Return ) to signal you are done locating point. |
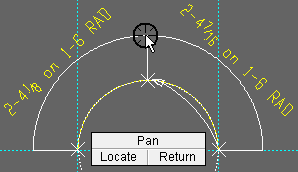
|
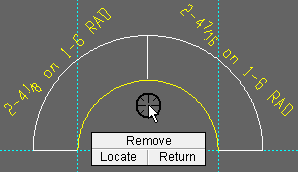
7 . Dimension Add Arc draws an arc dimension to each point marked with an X. Optionally reposition the dimension line, then left-click ( Locate ) to continue. Do not right-click ( Return ), or the arc dimensions will go away. |
|
8 . The temporary construction circle disappears, and the chain of arc dimensions is now added. You can add additional chains of arc dimensions, or right-click ( Return ) if you are done. |
page 1 | contents | objects > arc dims > | objects -- arc dims | xxx add | top


